
Fixing Ceiling Water Stains After Ice Dams: The Right Way
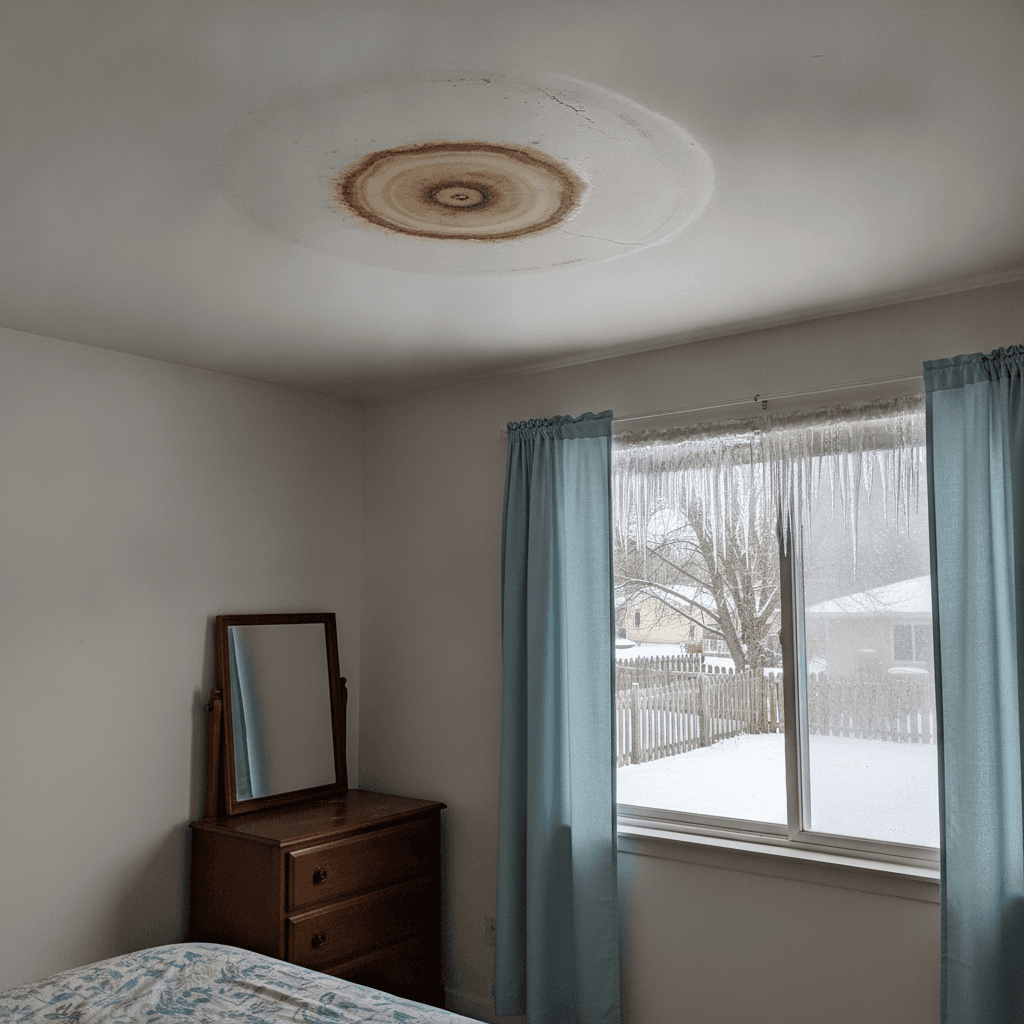
Every spring, the same brown blooms appear on ceilings across the northwest suburbs — usually near an exterior wall, usually under the eaves, usually discovered while you're lying on the couch looking up. If you found one this year, you're in large company: ice dams manufacture these stains by the thousand every Illinois winter.
Here's what actually happened to your ceiling, why you can't just paint over it, and what a proper repair looks like.
How the water got there
An ice dam is a winter plumbing problem your roof builds for itself. Snow accumulates on the roof; heat escaping through the attic melts the underside of that snow; the meltwater runs down the roof until it hits the cold overhang at the eave — where there's no warm attic below — and refreezes. Do that for a few days and you've built a ridge of ice at the roof edge.
Now the next melt has nowhere to go. Water pools behind the ice ridge, backs up under the shingles (shingles shed falling water, not standing water), finds a nail hole or seam, and drips into the attic insulation and onto the back of your ceiling drywall.
The drywall soaks it up, the water carries dissolved tannins and minerals through the board, and as it dries you get the classic brown-ringed stain. If enough water came through, the board softens, sags, or the paint bubbles.
If you're in Huntley or the northwest suburbs, this is the exact job our drywall repair and ceiling stain repair service is built for — seal or replace, texture, and paint in one visit. Ice-dam ceilings are a February–March regular in Cary, McHenry, and Lake Zurich in particular, thanks to wooded, snow-holding lots and lake-effect winters.
Why you can't just paint over it
This is the expensive lesson people learn every spring: water stains bleed through ordinary paint. The staining compounds are water-soluble, and the water in fresh latex paint reactivates them — the stain literally travels up through the new coat. Sometimes it takes weeks, sometimes days. Two coats doesn't fix it; it just delays the reappearance.
The fix requires a stain-blocking primer — a shellac- or oil-based sealer that the stain can't migrate through — before any paint. This is a two-minute step for someone who knows, and its absence is why so many "fixed" ceilings develop a ghost ring by summer.
The right repair, step by step
Step 1: Fix the source first. A ceiling repair under an unresolved leak is a subscription, not a repair. Ice dams point to attic insulation and ventilation issues (heat escaping is what builds the dam), sometimes plus roof-edge protection. Get the underlying issue addressed — a good roofer or insulation contractor is the right call — before finishing the ceiling. If your stain appeared this past winter and hasn't grown, the melt season is over and it's safe to repair now; just plan the attic fix before next winter.
Step 2: Assess the board. Press gently on the stained area. Firm drywall that's merely stained can be sealed and repainted. Soft, crumbly, or sagging board — or board that got saturated repeatedly — needs the damaged section cut out and replaced. Saturated drywall loses its structure and never gets it back; sealing over soft board is another version of painting over the problem.
Step 3a: If the board is sound — seal and repaint. The stain gets sealed with stain-blocking primer, then the ceiling gets painted. Note: the ceiling, not just the spot. Ceiling paint flattens and ages, and a fresh patch of even the same paint reads as a visible sheen difference in daylight. Blending to the natural break — usually the whole ceiling plane — is what makes the repair invisible.
Step 3b: If the board is damaged — cut, patch, and finish. The damaged section gets cut back to sound board and solid backing, a new piece gets fitted, and the seams get taped and mudded in feathered coats. Then comes the part that separates a patch from a repair: matching the ceiling texture — most suburban ceilings have spray texture that a smooth patch sticks out of like a scar — then priming and painting to a uniform finish.
Step 4: Check it in raking light. A ceiling repair gets judged in afternoon sunlight coming through the windows at a low angle. That's the light that reveals ridges, texture mismatches, and sheen lines — so that's the light to inspect in before anyone calls it done.
Why we tell people to hire a painter for this — and yes, we're biased
Most drywall handymen do steps 2 and 3 competently and stop at "ready for paint." Now you need a second contractor, a second appointment, and a paint blend over someone else's mud. The texture match and the paint blend — the parts that make the stain actually disappear — are painter's work.
We're painters who do drywall, so the whole sequence is one crew and usually one visit: assess, replace or seal, tape, mud, texture, prime, paint, done. I learned the value of that the practical way — on my own flip houses, where every ceiling had to pass a buyer's inspection, a stained ceiling reads as "roof problem" and costs real money at the negotiating table.
One more thing: don't ignore a small stain
A faint ring the size of a coffee mug is your house filing a report. It's telling you where water got in this winter — and next winter's version of the same event may not be small. Fix the stain properly, but more importantly, use it as the prompt to get the attic checked before December.
If you've got a stained or sagging ceiling anywhere in the northwest suburbs — Huntley, Crystal Lake, Cary, McHenry, Lake Zurich, or beyond — we'll take a look, tell you honestly whether it needs sealing or replacing, and give you a free written estimate for a repair that's finished through paint. Found a stain this spring? Send us a photo — for most ceiling stains we can give you a written price without a visit. Get a free drywall repair estimate. We return every call within 24 hours.
And while the ice is on your mind: the same winter that stained your ceiling is working on your exterior paint too.
Got a stained or sagging ceiling?
One crew: seal or replace, tape, texture, prime, paint. Free written estimate, callback within 24 hours.